Filters are one of the most underutilized features within Looker Studio.
Chart Filters allow you to include or exclude certain data points based on the attributes you are looking for.
Think of Looker Studio Filters as a way to Display Only the good information you want to show for that particular chart really really fast.
You can use filters at a page level, chart level, or report level!
Watch This Video On Filters!
Examples of Filters In Use
Want to just see 1 product sales in a scorecard? ✅ Done with a filter
See only events that contain the word “Click”? ✅ Done with a filter
Make millions working 10 hours or less each week. 🛑 Not Done With a Filter – if you figure it out, send us an email 😊
How To Add A Filter – Where To Start
Creating is a simple way to get moving faster to know your data is around.
- Select a chart you would like to add to filter
- In the “Data Panel”, you will scroll all the way to the bottom.
- Click “Add Filter”
- We are off to the races!
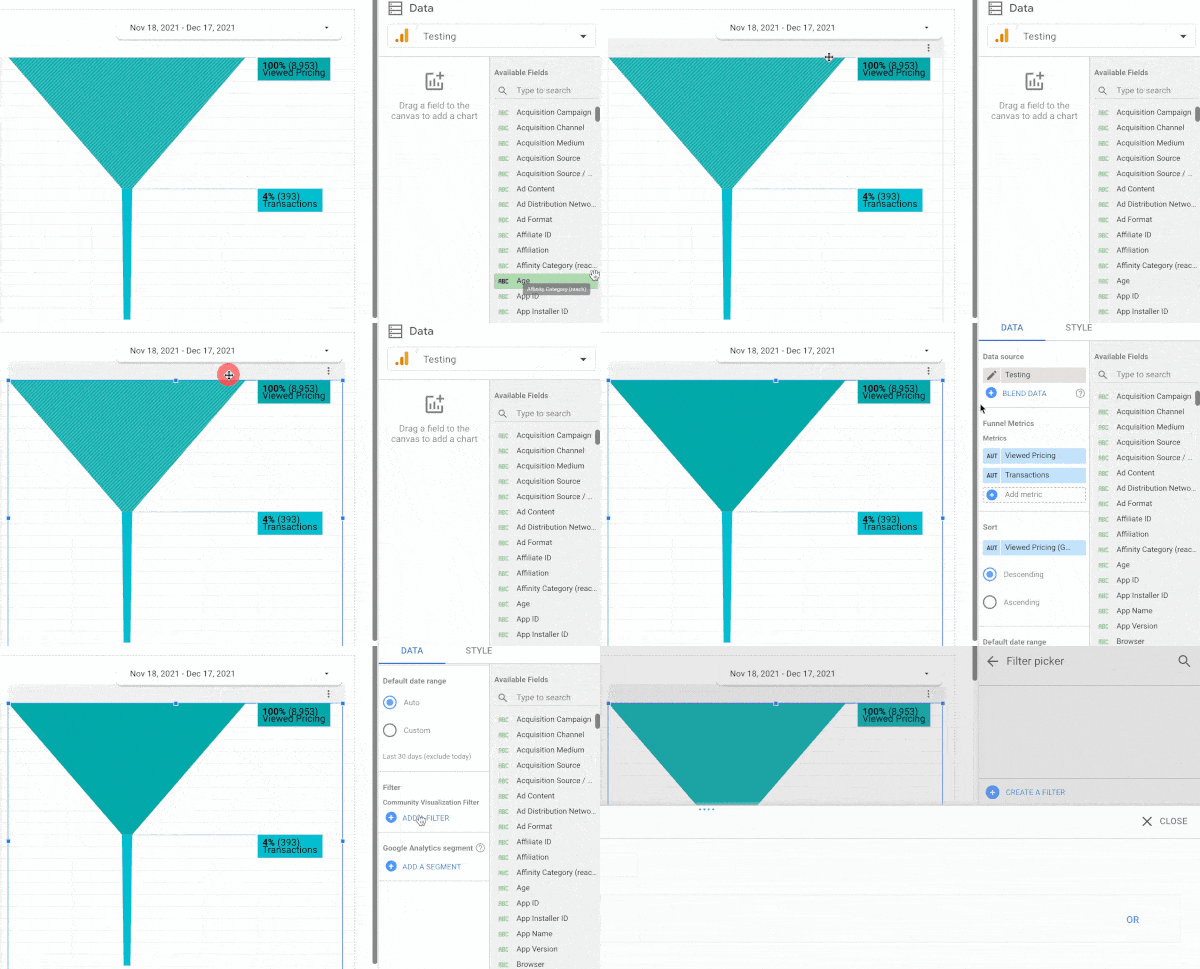
Create Your Filter Requirements
Now that you have the filter you will find a multitude of options to select form.
Start with your question of what you want to see. Write it down in actual words.
⏰ Example Time ⏰
I just want to see only “Event Category” where the name is “Lead Journey”.
We can work with that 👆
The 4 Options You Have When Creating a Filter
- Whether to “Include” or “Exclude” the data identified in your filter
- The Dimension or Metric you want to use – Read Up On Metrics And Dimensions Here
- How you want to filter – REMEMBER: Everything is case sensitive
Equals= Exact MatchContains= Exists in the fieldStarts with= Begins the string (numbers or metrics)Regex Match= If you have regex skills test it at Regex101.comRegex Contains= I honesly never use this as “Match” is better usuallyIn= Is Within the string (confusing as its alsmost the same as contains)
Let’s Build Our Filter!

- “Include” Vs “Exclude”
We want “ONLY” 1 event category which will be “include”.
- Dimension will be “Event Category”
- Equal to – Lets keep it simple
- Field – “Lead Journey”
Ta Da!
Now your chart will only display all metrics or dimensions which meet the criteria.
How to Name & Organize Your Filters Usefully
Looker Studio does a terrible job of giving you the ability to categorize and update filter criteria.
Here is the naming convention we use over at mediuathentic.com
Source – Criteria – Action – Use
Example Time ⏰
GA – Category – Lead Journey – All
This allows you to remember what it’s attached to, what you are filtering, and how you are filtering on that metric or dimension.
PRO TIP – Accessing Filters From Report
To access EVERY FILTER on a given page, you can go to Resources > Manage Filters > View all Filters
In the Manage Filters page you are able to duplicate filters, rename them, and see how many charts they are applied to.
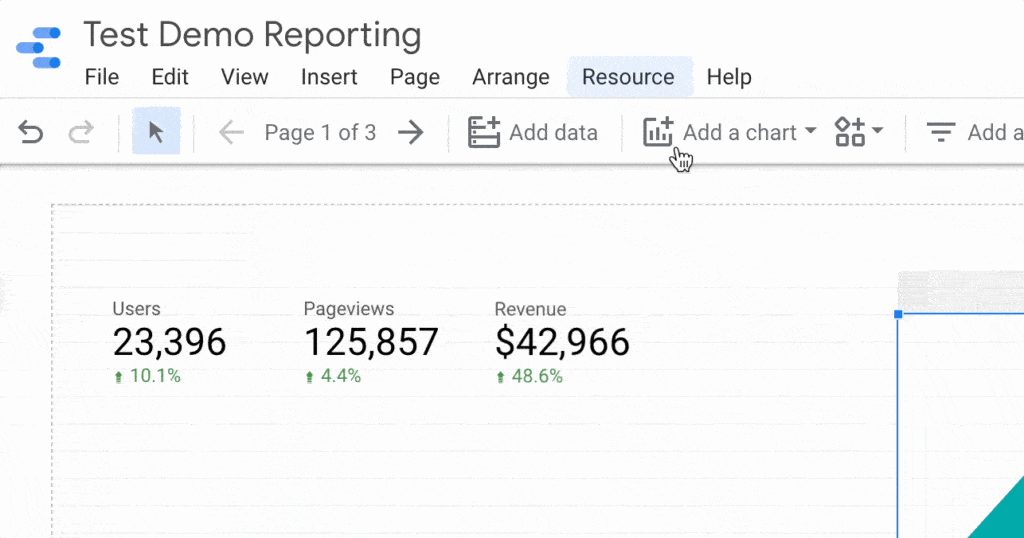
Pretty Neat!
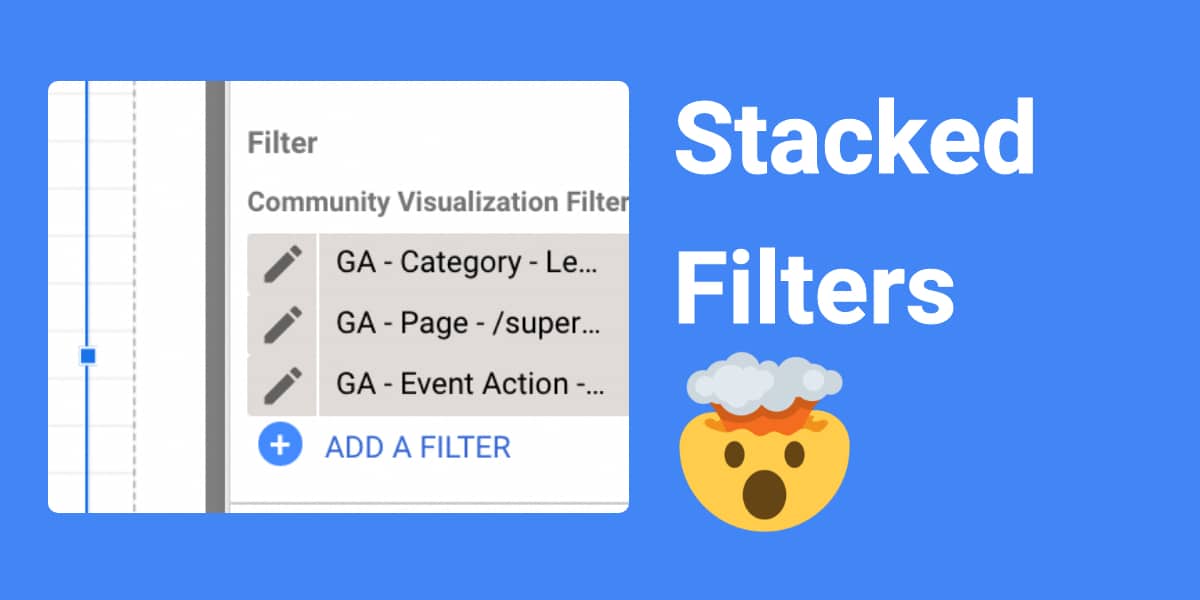
Stack Your Filters – Not A Single Giant Filter
You will want to keep each individual filter as simple as possible. This allows you to stack them for greater functionality and usefulness.
Example Time ⏰ :
We want to see how many people scroll 50% of the /super-epic-sales-page.
So to do this you could create 1 giant filter (not the best idea)
or
create 3-4 filters which you layer together.
First Filter: GA – Category – Scroll Report – All

Second Filter: GA – Page – /super-epic-sales-page

Third Filter: GA – Scroll Depth – 50
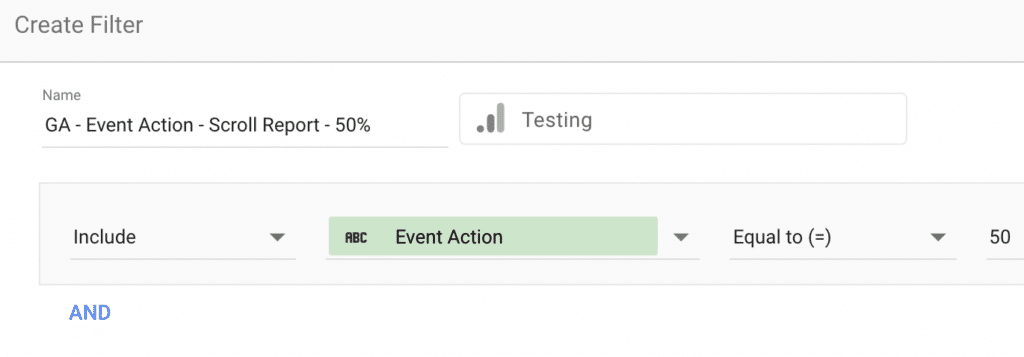
Your Looker Studio chart will now look like this
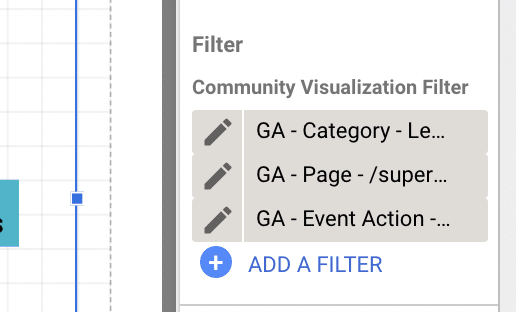
Three filters each pulling their own weight for you to easily answer your question!
Page Level Filters
Yes, you can use page level filters as well 🤯.
I find these only applicable about 10% of the time (why it’s at the end of this article) but it is worth noting, that you have the option of applying filters to an entire page of your Looker Studio report.
To Add a Page Level Filter
For your page filter to work, you first will need to define a single data source for that page (one of the reasons we dont use it too much).
Accessing the page level filters is here:
Page > Current Page Settings
From there, you can select the data source, date range and filter if you would like.
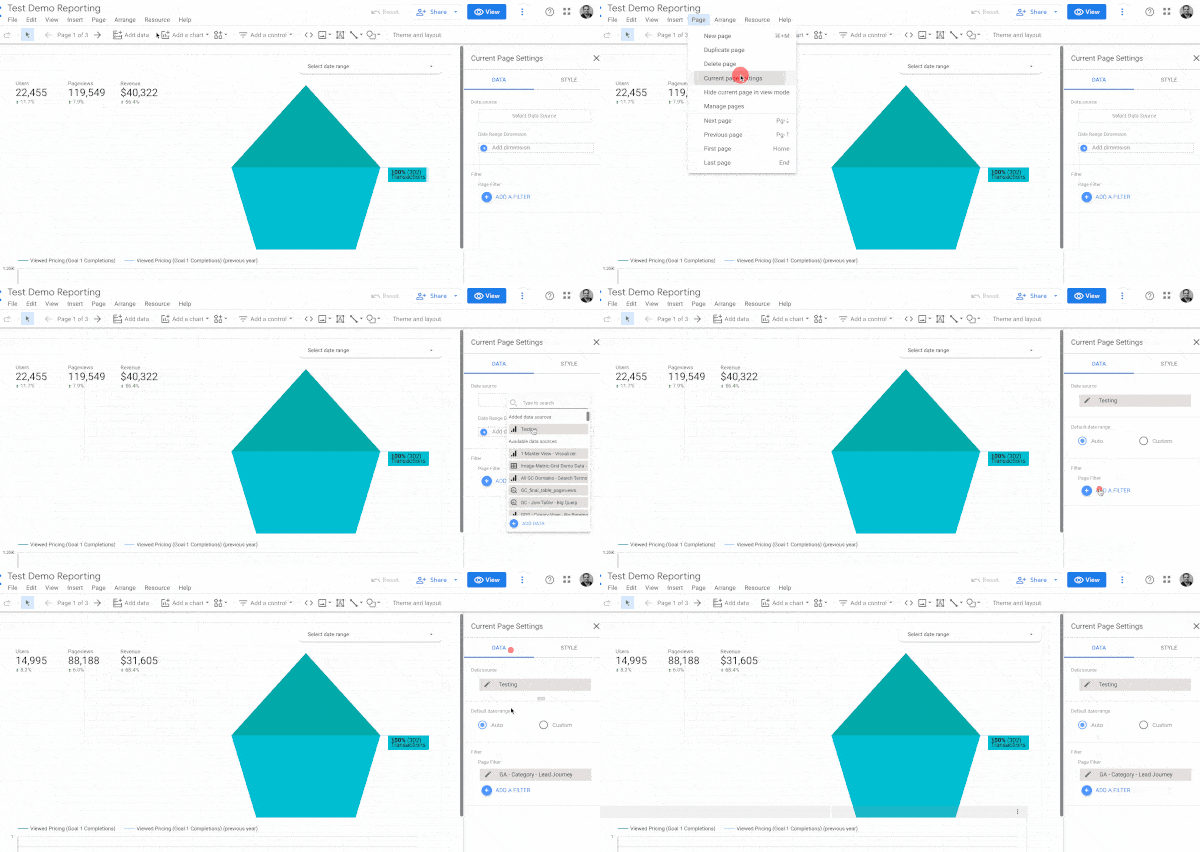
Again, I would keep this page level filter for only very specific use cases, as most times there will be exceptions on your page which you will be banging your head against the wall!
I hope this helps & see you in future tutorials!
